Sanity Connector
The Sanity connector indexes content into Nacelle. The connector uses webhooks to ensure data in Nacelle is always up to date. Setting up the connector is a straightforward process that requires a few updates in the Sanity and Nacelle Dashboards.
Sanity setup
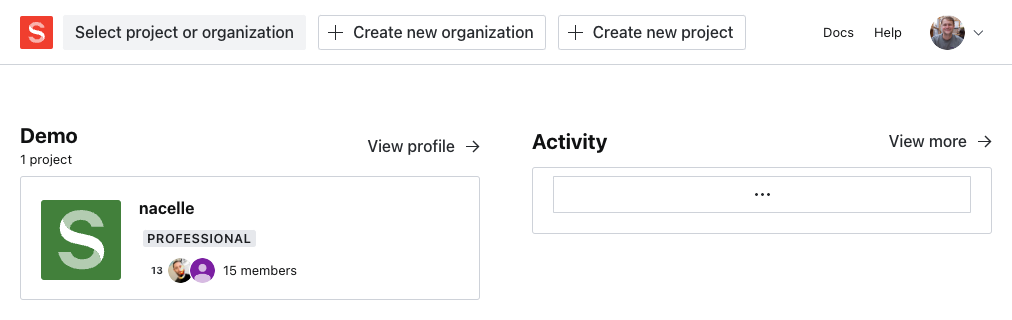
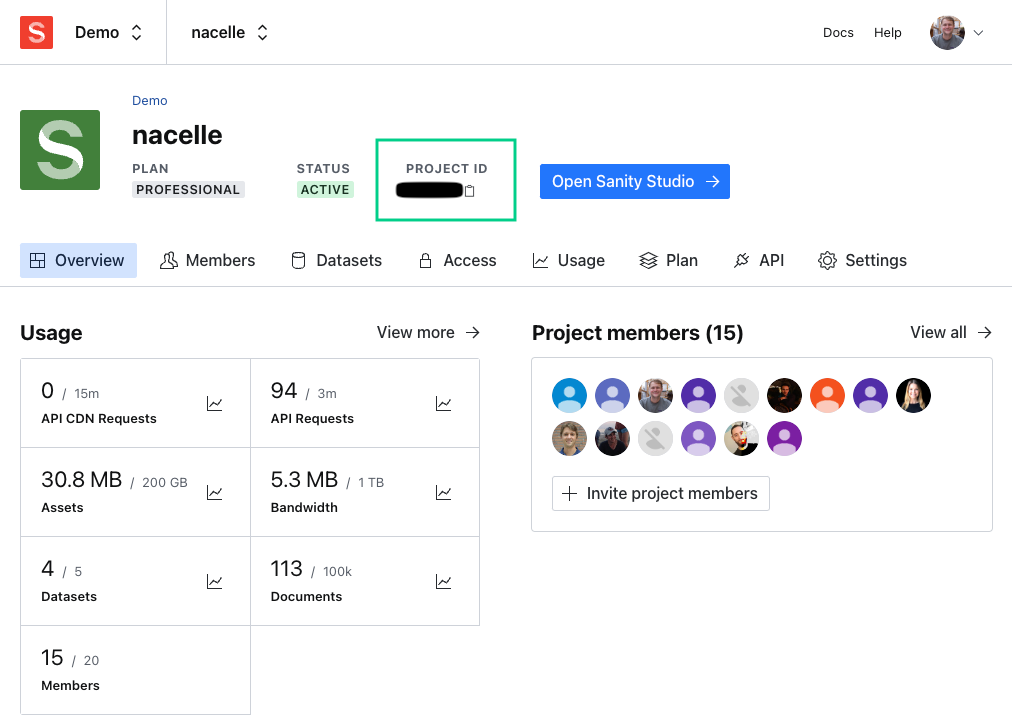
Let's start by getting the Sanity project ID by going to the Sanity dashboard and selecting the project.
Once you are in the desired Sanity project, the project ID will be displayed in the header at the top of the screen. Copy this for later.
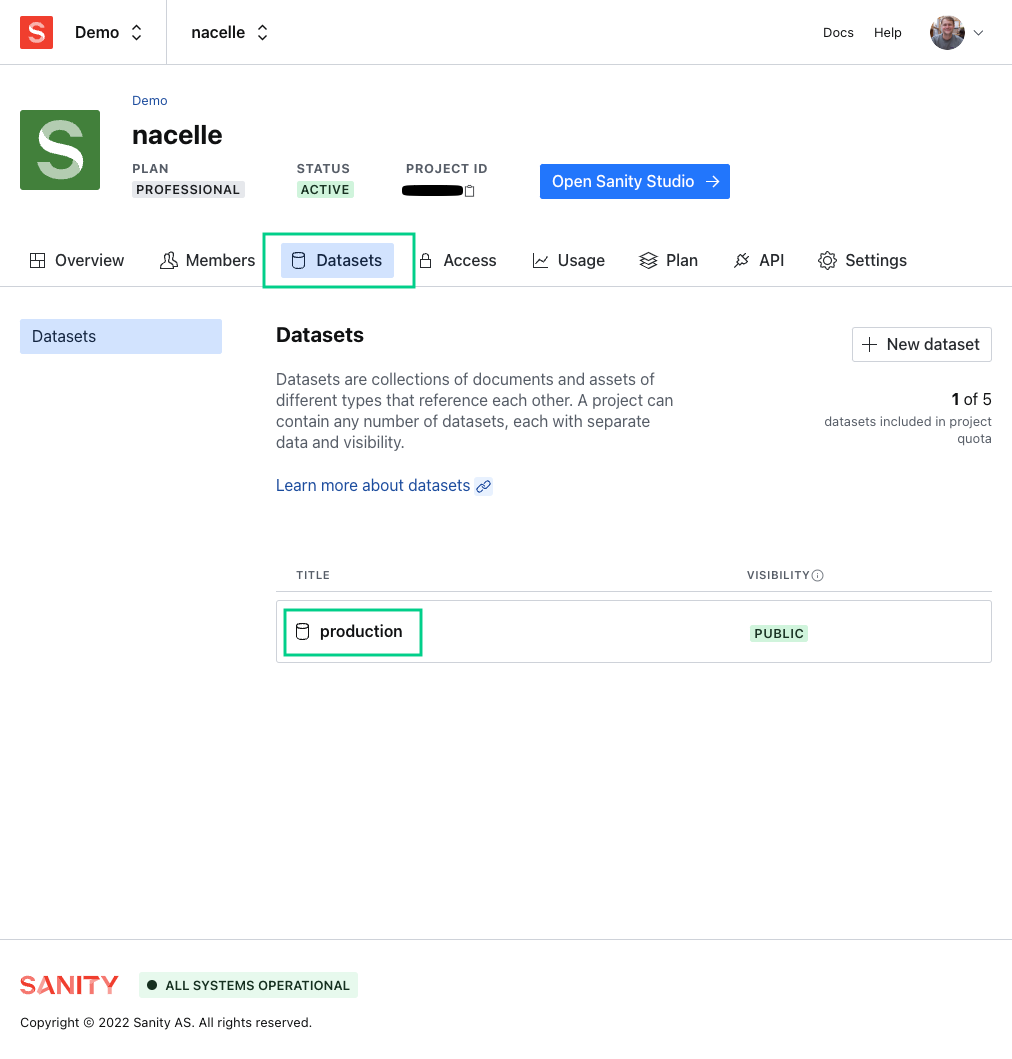
Click on the “datasets" tab within the Sanity project. (note, you may have multiple). You will need the name of the desired dataset - in this case, “production” - that Nacelle will ingest, so take note of this name.
Private datasets and content previews
For ingestion of private datasets or content previews, you can create an access token and provide it to Nacelle.
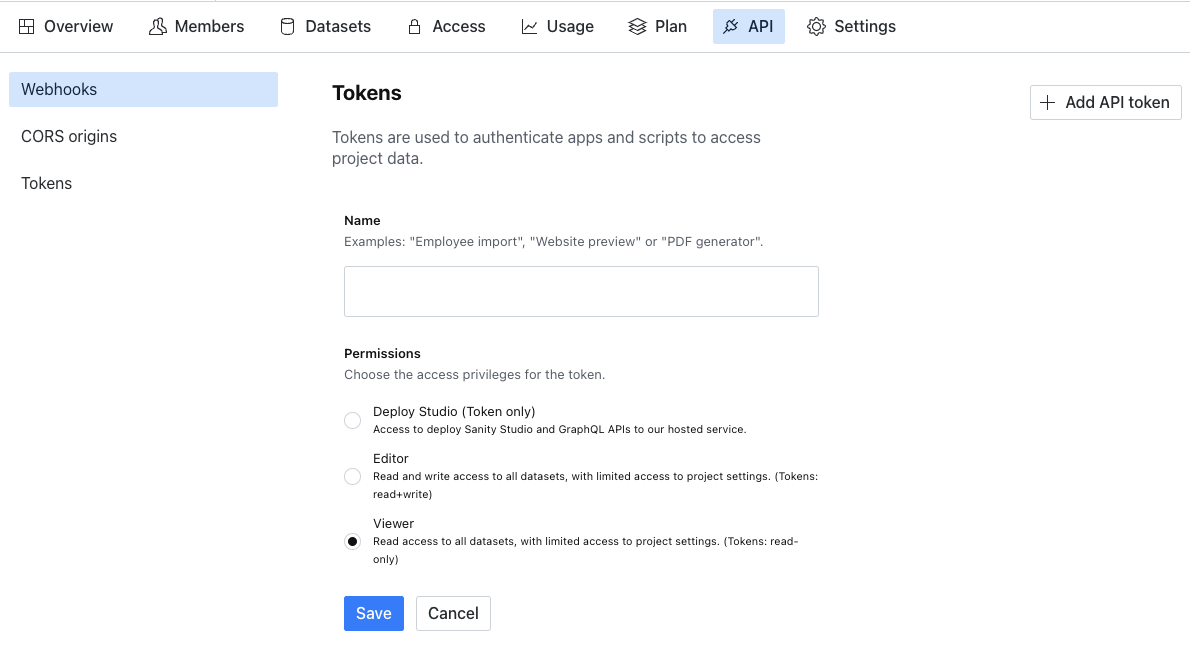
In the Sanity project settings, go to the API tab. Click "Add API token", name the token as you'd like, and leave the default "Viewer" permission. Save and copy the generated API token, as you'll need to provide it to Nacelle in the next steps.
Nacelle's setup
Now that your Sanity project is setup, head over to the Nacelle Dashboard and log in.
In the sidebar, click the dropdown for "Space" and select the space to use (or create one). Then, click the top tab "Data Connectors".
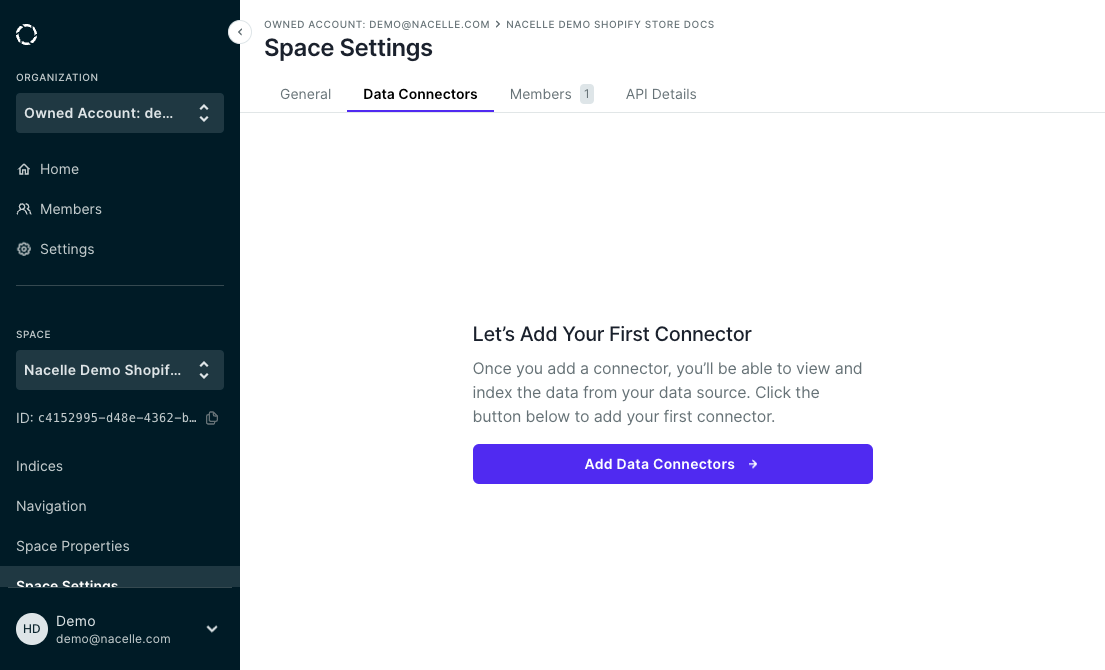
Click the "Add Data Connectors" button, and select "Sanity" in the dropdown.

Enter the Sanity Project ID, the Sanity Dataset to ingest, and your Sanity project's Webhook Secret. If desired, include the Sanity API token, which will allow ingestion of draft content and private datasets.
Once you click Save, Nacelle will begin to ingest data from Sanity.
Configure Sanity Webhooks
We can set up Sanity to automatically sync with Nacelle when content is updated. We will set up two webhooks for each Nacelle space, one for create/update and one for delete.
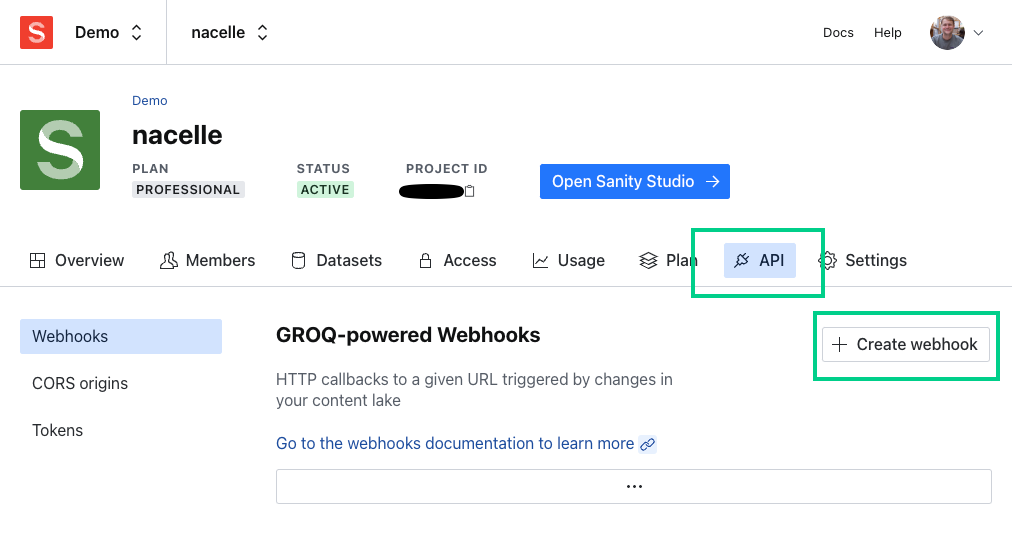
Return to the desired project within Sanity. After opening the project, navigate to the API tab, and create a “GROQ-powered Webhook.”
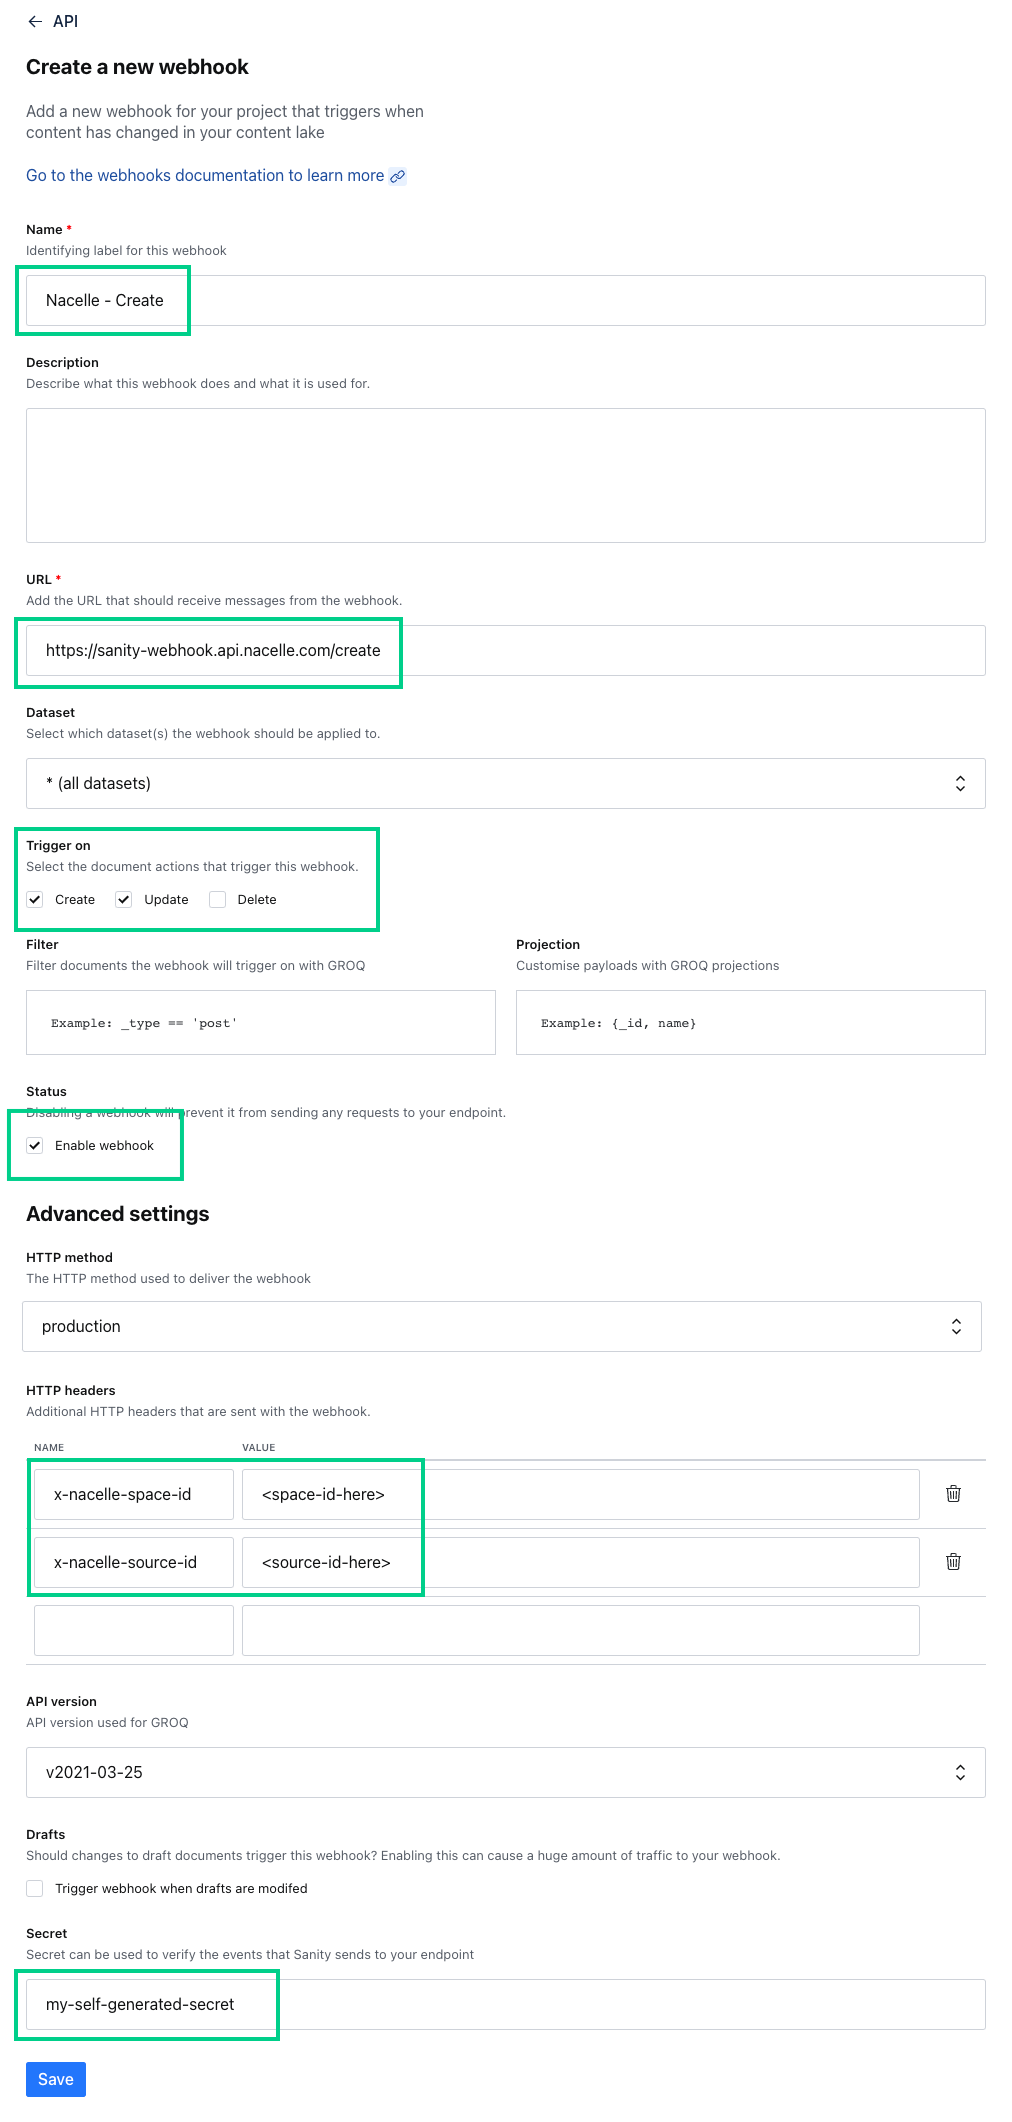
- Name your Webhook
- Add the correct URL.
- For Create/Update, it should be
https://sanity-webhook.api.nacelle.com/create. - For Delete, it should be
https://sanity-webhook.api.nacelle.com/delete
- For Create/Update, it should be
- Choose your data set from the drop-down (the same data set that was entered from your initial inputs)
- Select both CREATE and UPDATE, or DELETE from the trigger actions.
- Make sure the “enable webhook” box is checked.
- Add a header
x-nacelle-space-id, with the value being your Nacelle space ID (located in the Nacelle sidebar) - Add a header
x-nacelle-source-id, with the value being your connector's Nacelle source ID. You can find this in the Space Settings, Data Connectors tab. - Choose API version
v2021-03-25from the drop-down. - Create a webhook secret. This is a merchant-created string that's entered into Sanity. It should be the same for both of your Nacelle webhooks. Note it for later as Nacelle will use it to verify the security of your data.
- Hit Save
Example fields to modify from default:
Finally, be sure to go to your Nacelle space, go to the Data Connector tab, and edit the Sanity connector settings to include the webhook secret from above.
Now when your content is changed, Nacelle will continually be updated!
Nacelle Sanity CMS plugin
We have made a Sanity plugin to make it easy to link products and collections to your custom Content types.
Linking product and content data within the CMS can add risk to your composable stack's data consistency. Avoid this with Nacelle's CMS pattern.
It is important to avoid the composable anti-pattern of daisy-chaining, which you can learn more about here: https://nacelle.com/blog/cms-antipatterns-in-headless-commerce.
By using the Nacelle Sanity plugin, you ensure best practices are followed, and daisy chaining is avoided.
Installation & Setup
In your Sanity codebase, install Peer Dependencies
npm i @sanity/ui styled-components
Install the plugin
sanity install @nacelle/sanity-plugin-nacelle-input
Credentials
You'll need to provide the ID and Token associated with your Nacelle space. These credentials can be found in the Nacelle Dashboard.
Config file for single space
./config/@nacelle/sanity-plugin-nacelle-input.json
{
  "nacelleEndpoint": "your-nacelle-storefront-api-endpoint",
  "nacelleSpaceToken": "your-nacelle-graphql-token"
}
Within
.env.development / .env.production
SANITY_STUDIO_NACELLE_SPACE_ENDPOINT=your-nacelle-storefront-endpoint
SANITY_STUDIO_NACELLE_SPACE_TOKEN=your-nacelle-public-storefront-token
Adding Credentials to Multiple Spaces
Create a config file at
./config/@nacelle/sanity-plugin-nacelle-input.json.
Then add a nacelleSpaces array:
"nacelleSpaces": [
  {
    "spaceName": "Space 1",
    "nacelleEndpoint": "space-1's-nacelle-storefront-endpoint",
    "nacelleSpaceToken": "space-1's-nacelle-public-storefront-token"
  },
  {
    "spaceName": "Space 2",
    "nacelleEndpoint": "space-2's-nacelle-storefront-endpoint",
    "nacelleSpaceToken": "space-2's-nacelle-public-storefront-token"
  }
]
Use in Schema Documents
Set the type field to nacelleReference to use the custom input component:
{
  name: 'reference',
  title: 'Reference',
  type: 'nacelleReference',
}
Options
The custom input component default allows you to reference products or collections.
Realistically, you probably want to restrict the component to either products or collections. To do that, provide either ['products'] or ['collections'] to options.dataType:
// example: collections ONLY
{
  name: 'collectionReference',
  title: 'Collection',
  type: 'nacelleReference',
  options: {
    dataType: ['collections']
  }
}
// example: products ONLY
{
  name: 'productReference',
  title: 'Product',
  type: 'nacelleReference',
  options: {
    dataType: ['products']
  }
}
Data shape
The custom input component will store a reference object with the following format:
{
  type: 'NacelleReference',
  referenceType: 'PRODUCT', // PRODUCT or COLLECTION
  nacelledEntryId: '123455'
  handle: 'blue-shirt'
  locale: 'en-US'
}
Backward Compatibility with @nacelle/sanity-plugin-pim-linker
@nacelle/sanity-plugin-pim-linkerFor projects using the legacy @nacelle/sanity-plugin-pim-linker for product/collection references, we provide a backward-compatible custom input called nacelleData. This input stores only the handle of a particular product or collection rather than a structured nacelleReference object.
Use in Schema Documents
Set the type field to nacelleData to use the custom input component:
{
  name: 'handle',
  title: 'Handle',
  type: 'nacelleData',
}
Data Shape
The backward-compatible custom input component will store only a reference handle.
{
  handle: 'blue-shirt'
}
Updated over 2 years ago